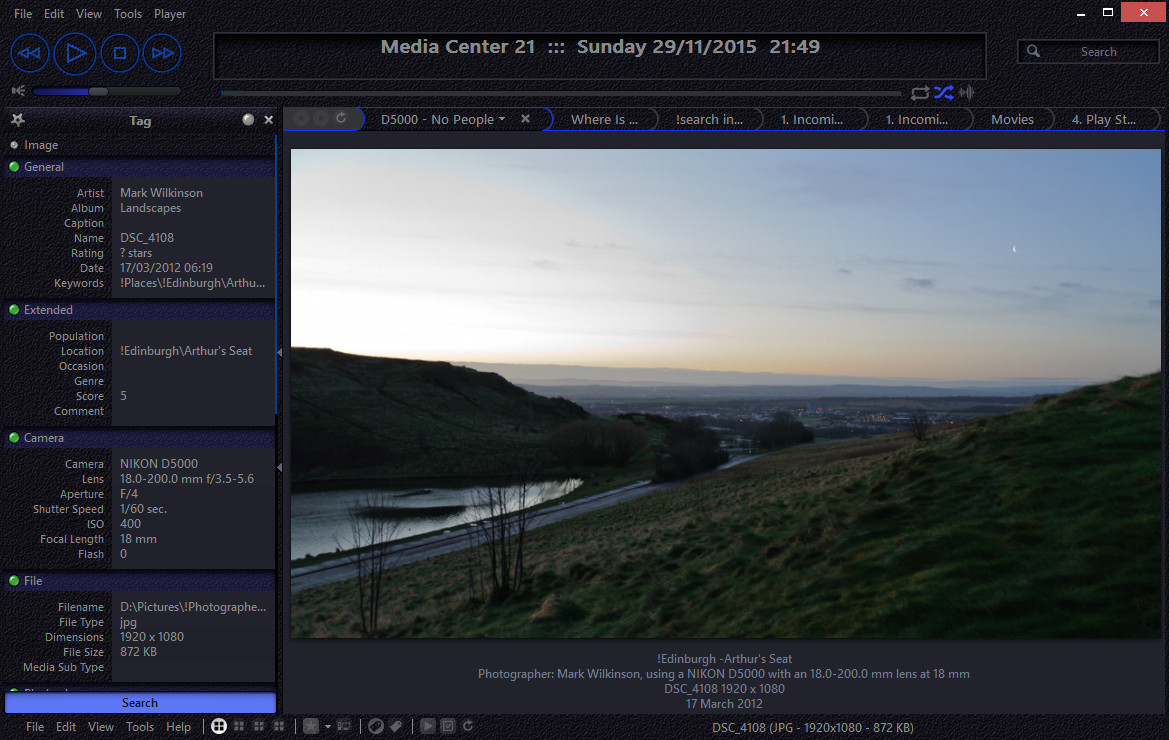
Skinning The 'experimental' tag windowThe 'how do you do that?' question has been asked in various threads, so I figured an answer here might be appropriate. Bear in mind that things might change in the future, but for now, it's quite simple to do, mostly because we don't have much to customise.
To apply skinning to the experimental tag window you just need three images and some xml for the skin file.
Images1. Group image (with expanded/collapsed image)

2. Field label image

3. Field image
 required xml
The skinning engine needs to know what to do with your images, so you need to add a "TAGWINDOW" block to the skin's 'main.xml' file. In Black and Blue Too, it looks like so:
<TAGWINDOW>
  <Entry Name="Group" Bitmap="TagWindow_Group.png" NumberImages="2" Columns="20,?-Flex,10" Rows="1,?-Flex,1" Cells="B1-HTILE,B2-HTile,B3-HTILE" />
  <Entry Name="Field" Bitmap="TagWindow_Field.png" Scale="4" NumberImages="2" Rows="4,?-Flex,4" />
  <Entry Name="FieldLabel" Bitmap="TagWindow_FieldLabel.png" Scale="4" NumberImages="1" Columns="?-Flex" Rows="?-Flex" Cells="A1-Tile" />
</TAGWINDOW>
The text colour is derived from the value entered in the <FRAME> block, but be careful here as that value is used in other areas too, such as tooltip borders and text, so a balance needs to be found. Hopefully we can get exclusive values for the tag window in the near future.
Put all that together, and here's how it looks in action (pardon the pun

):

The example is called Black and Blue Too, which can be found
here if you would like to try it.
The experimental tag window has a blue-ish mouse over shade as you move the mouse between fields in the tag window. This colour is currently hard coded into MC and we have no control over it. This may change though. Luckily for me, it works quite well in this skin.
So there you have it, quick and simple experimental tag windoow skinning.
Enjoy.
-marko

 Author
Topic: Standard View Skinning Tutorial (Read 80295 times)

