As promised, here's the update. It took longer than expected. The idea is that you build the view as you move through the article, getting a feel for what everything does.
The original tutorial from 2009 can be found
here.Also note, that although old, all of this tutorial is still current at this time, MC28, December 2021.
Adding a new view to the treeWe are going to add an "Audio" view, click on "Audio" in the tree before starting.
To add a new view scheme to the tree, click on
View in the top toolbar, hover over "Add View", and then click on 'Add library view...'. You will then be presented with the following dialogue:
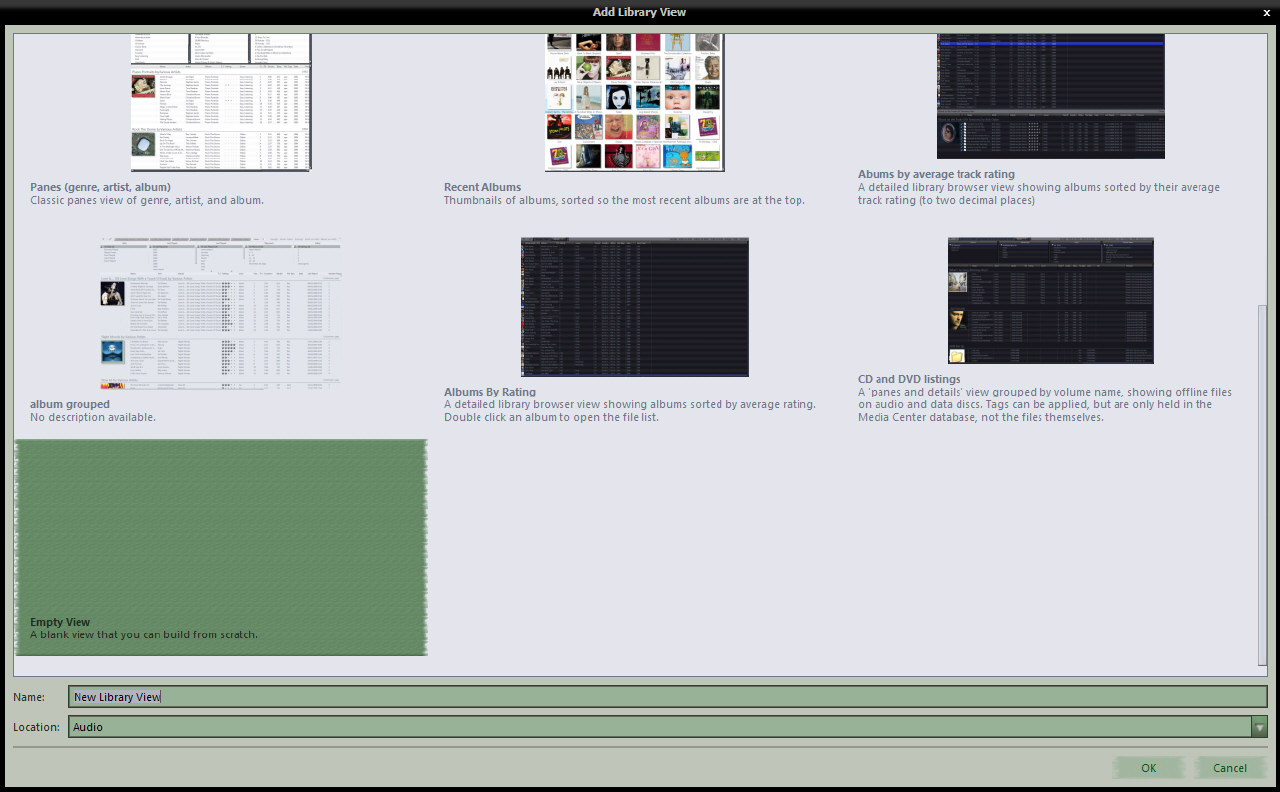
This is a list of preset view schemes, with a thumbnail image and description. If you see one there that fits the bill for you, the quickest way to add it is to double click on the thumbnail of choice.
The view will be added to the tree using the name as shown below the thumbnail, in the place on the tree specified in the 'Location' field.
If you wish to change the name, or the location, single click to select the view, make the required changes in the two fields below, and press the OK button.
For the purposes of this guide, I have chosen the 'Empty View'. When you choose this option, remember to give it a name, otherwise it will get added as "New library view" and you'll need to rename that in the tree directly after the view has been created. The view is added and you are immediately shown the "Customise View" dialogue.
Before we continue, a few more points about this "View Picker" mght be useful.
- If you wish to change the "Location" field, do so before deciding on a view to add, as changing "Location" resets the view choice, and reverts any change you may have made to the "Name" field. A bit counter intuitive to have to work from the bottom up, but that's what we have at the moment.
- If one of the predefined views is chosen, that view is added to the tree and selected for viewing. "Customise View" dialogue is only shown in the next step when the "Empty View" is chosen. To further customise a predefined view, right click the new view in the tree and choose the "Customise" option.
- The "View Picker" attempts to be intelligent regarding the choices of predefined views it presents. For example, if "Location" is set to "Audio", it will not present any views that contain images or video files, and so on.
Now, getting back to our new view....
Customise Current ViewThe customise current view dialogue for our new 'empty' view looks like so:
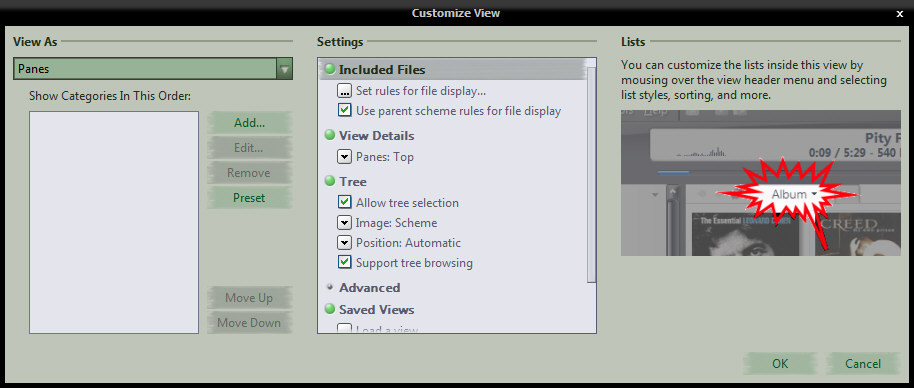
Here, we can see from the "View as" field that the view scheme is set to use the classic MC "panes" layout, also, note that the "Show Categories In This Order" box is empty. Leaving the view set to "Panes" for now, the next step is to add some "Categories"...
Categories (panes)Categories are panes. To add new panes to your view, click the add button, and you will see a new dialogue that looks like so:
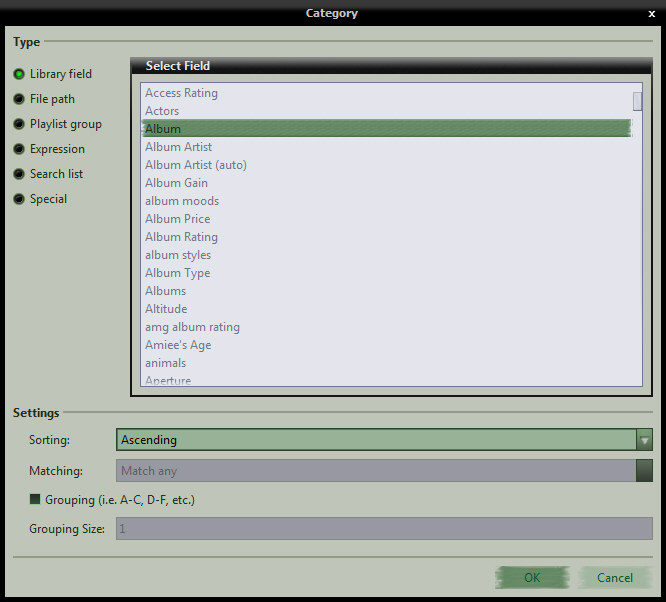
- Library Field: The library field is the most used and easiest to explain. With a few exceptions, any field you have in your database, be it a bog standard, regular field or a custom, calculated data field, is present in the 'Select Field' list, so, you find it, select it, choose the sort order you desire, and if you would like grouping, specify that also, and press OK to return to the main customise view dialogue. 'Matching' is used for Playlist group and Search list type categories, and specifies how you want MC to treat multiple selections in the pane. If any of the settings options do not apply to a given field, they are disabled. In setting up this view scheme, we will be using the Library field option exclusively, but before moving on, I'll skim over the other options.
- File Path: This option allows you to add a pane that effectively contains a folder tree of the files in the list. If you leave the path field empty, then the tree is built using the drive letter(s) as the root, or starting point, otherwise, any folder you specify here becomes the 'virtual root' or starting point, and only files contained within that folder and it's subfolders will be listed.
- Playlist Group: This option allows you to select a playlist group from the tree, and all playlists and smartlists contained within that group will be listed in the pane. Only files that exist in the playlists and smartlists will be shown in this case.
- Expression: Expressions are a powerful and polarising option, and too much to get into in this post. If you're interested, there's a brief introduction here, an example here and a full list of functions here.
- Search list: This option allows you to add a pane that contains several search rules, each one being selectable in it's own right and the file list will adapt accordingly. For audio, imagine a pane with things such as 'Recently Imported', 'Most Played' 'Never Played' etc. etc.. You give each search a name as you would like it to appear in the pane and specify the rule you'd like the pane to apply. The beauty of these is, that you can specify different sort rules in the searches and when selected, they override the sorting specified in the "Customise Current View" dialogue
So, getting back to our view scheme building, the first pane we want is the [Album Artist (auto)] field. Select that, press OK, we are returned to the Customise view dialogue, and a second or so later the [Album Artist (auto)] field shows up in the categories box. Go through these steps once more to add the [album] field. If you are not happy with the order of the categories, you can drag and drop them into the order you desire, or if you prefer, use the "Move Up"/"Move Down" buttons.
For now, accept the default settings as they are and press the OK button to close the cutomise view dialogue and see your new "Artist/Album" panes view...
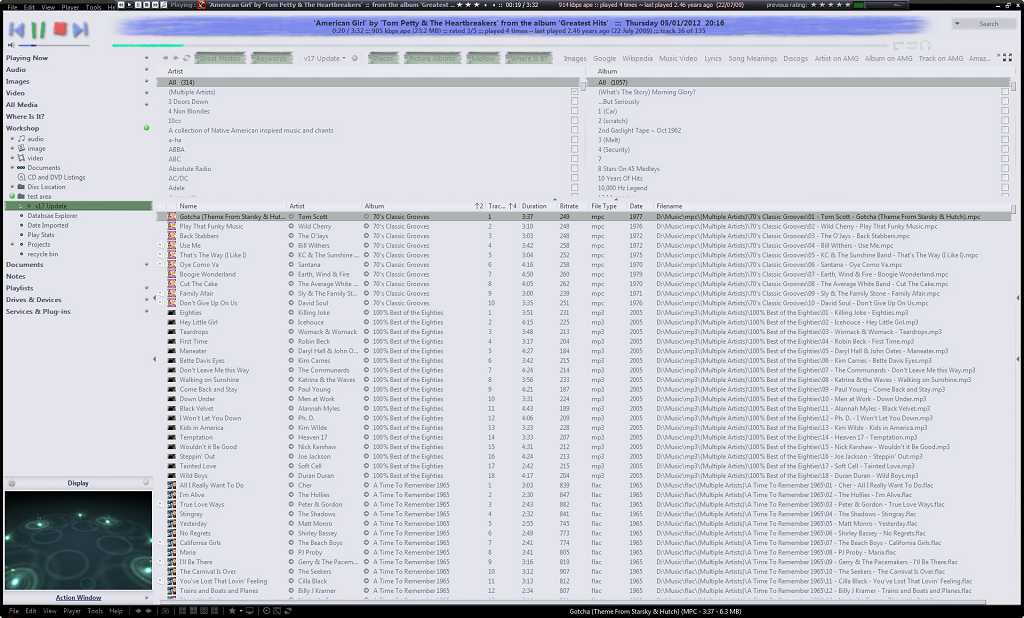 (click image to view full size)
Click around in the view scheme for a bit... This is a very basic view. Simple audio only, two pane affair, but much can be learned from it. Let's start with the panes first:
- Select an artist in the left pane, see the album pane on the right adjust to list only that artists' albums, and the file list below adjust to list only those tracks.
- Select an album in the album pane, and the artist pane filters down to show the artist for that album. In this particular view scheme, that might not be 'all that', but imagine a more complex view with four or five panes? It filters in the same way and can be very impressive indeed. If you ever get lost, note that as soon as you begin filtering, a "reset selection" option becomes available in the view header, which does exactly as expected and resets the selection in all panes at once. This same option, as well as one designed to reset a single pane, is available on the right click menu from inside any pane. If you don't like or desire this behaviour, it can be turned off, and that is covered later on in this article
- If you need to add a pane, you can do so directly from here, without the need to open the full 'Customise' dialogue, by clicking on a pane header. Doing so, produces an intuitive menu...
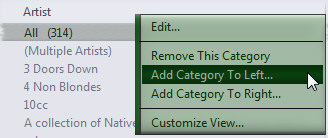
- Edit: Allows you to change the selected pane completely.
- The middle three really don't require any explanation
- Cutomise View...: Opens the Customise view dialogue
- While we are in this area, click on the artist pane header, choose "Add category to left" and add a "Media Type" pane. For now, it will only list "Audio", but that will change later!
- The View Header Menu
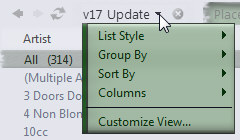
Use the view header menu to fine tune the view scheme. Spend some time experimenting with these options to see their effect and learn what suits the view's purpose best. Note that the menu changes if you choose a 'thumbnail' list style, removing the then redundant 'Columns' entry, replacing it with options that allow control over thumbnail related stuff such as text and spacing. Personally, I've never used the column picker in the view header menu, as my preference is to use the same menu available when right clicking on a column header. - Also note the View's entry in the tree. See that it is expandable, and that if you drill down into the tree and select something, the panes are removed, leaving just the file list in view. Re-select the main view entry in the tree to return to pane browsing mode.
=================================================================================================================================
When you are ready, the next job is to go back into the 'Customise View' tool and go through the view options and settings that were left at default earlier...
To refresh, here is that tool again, now showing the "Media Type" category we added earlier:
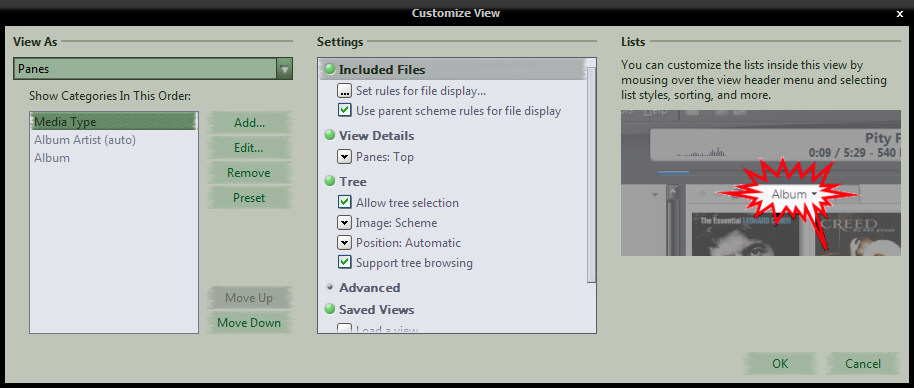
Staying with panes for now, let's start at the top and work down...
Set rules for file display &
Use parent scheme rules for file display- "Use parent rules" is set as default. It makes sense too. We added a view as a child of the main "Audio" entry in the tree. That entry is configured to list all audio files that exist in the library, and as this view inherits that configuration, that's what it lists too. Take the tick out of there by clicking on it, read the next section, then press OK to see it in action.
- There are now no filters in place at all, and the view is listing every file, of every type, that you have in your library. If you are an "Audio only" user, this will be an extremely boring exercise for you as you will see no difference whatsoever! The "Media Type" pane that we added earlier should now show all the different media types that are in the file list below.
- Tip: Right click on tool bar, up where it says File, Edit etc. and add the button called "List Style: Automatic", then click on it to activate it. See what happens in the list when you switch between Audio and Image or Video?
Once you're bored playing with that, go back into "Customise View" and we'll talk some more about "Rules for file display"...
- Clicking on the "Set rules" entry will launch Media Center's "Search Editor" tool
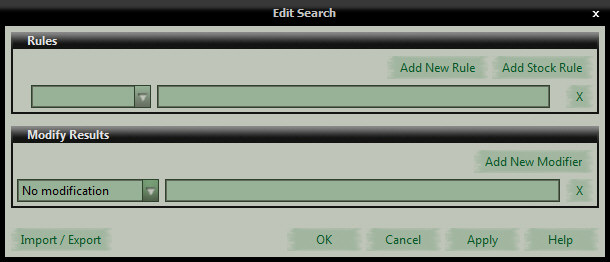
As expected, it is completely empty. Let's apply a couple of simple rules that will exclude Multiple Artist albums and video files...
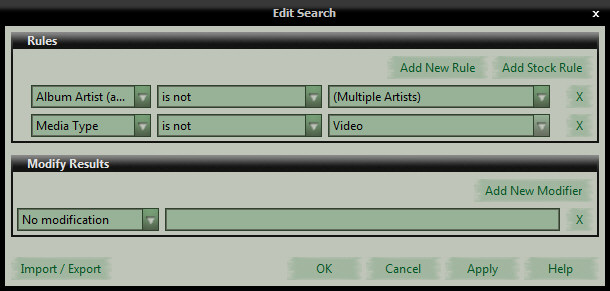
- OK out of there, all the way out of the "Customise" tool, and see the effect the new rules have had. While not functionally useful, this should demonstrate two things...
- The default settings are extremely well chosen, meaning that most often, you won't need to be concerned with them, and,
- should you want something a little different, such as all your media in a view under "Audio"!!, you have the means at your fingertips to make it happen.
Let's return to the Customise View tool...
Continued--->
